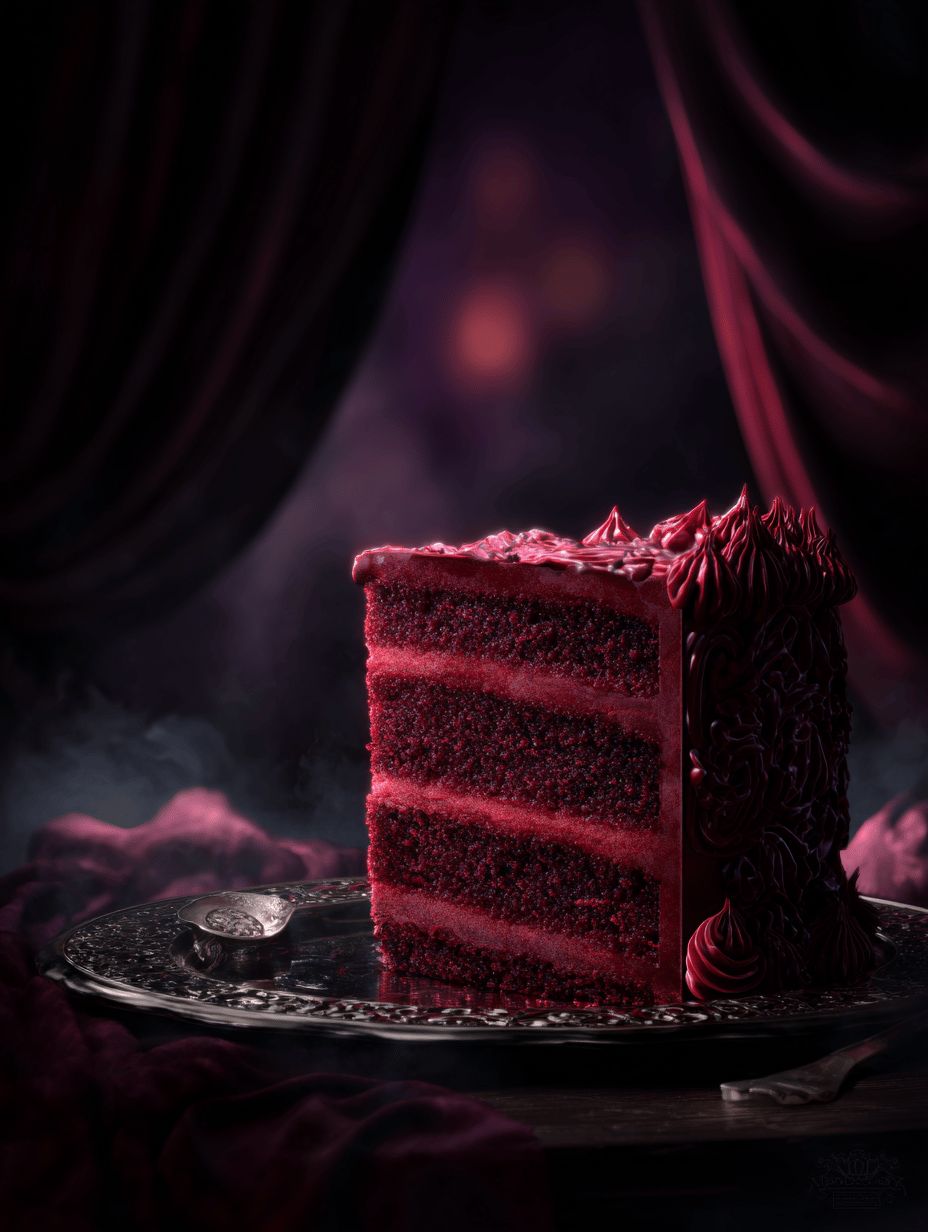
There’s something hauntingly beautiful about a blood-red velvet cake. It’s not just the deep crimson color that grabs you, but the quiet chaos of its ingredients coming together—creamy, tangy but tender, with a whisper of cocoa. I’ve always thought of it as a secret code, a guilty pleasure wrapped in velvety layers, perfect for nights when you want a little drama on your plate.
Most recipes focus on the visual impact or the smooth crumb, but I’ve been obsessed with how the subtle acidity from buttermilk slices through the richness—kind of like a whisper in a crowded room. This cake isn’t just dessert; it’s a statement, a reminder that beauty often hides in the unexpected. Plus, it’s perfect for those late-night baking sessions when you need something a little darker, a little more daring.
What I love most is how the color seems to shimmer under candlelight, almost alive. Baking this feels like a ritual—measuring, mixing, waiting—each step peeling back layers of ordinary to reveal something a bit more mysterious. It’s not just about the look, either; it’s the way it makes the house smell—rich cocoa, a hint of vanilla, the faintest oozing of red wine—like a secret worth keeping.
Why I Can’t Stop Loving This Blood-Red Velvet
- It’s a little chaotic, like my kitchen after baking, but somehow it still turns out perfect.
- I get a rush every time I see that deep red slice cut clean—like a secret unveiled.
- The tang of buttermilk and the smoky cocoa blend into a taste that’s both nostalgic and rebellious.
- Sharing a slice feels like whispering a secret—quiet, intimate, a little wicked.
- It’s the perfect cake for late-night talks or a quiet moment of indulgence.
Blood-Red Ingredients & Their Hidden Secrets
- Sugar: I like a slightly gritty feel, so I use a mix of superfine and raw sugar for depth. Skip this for a smoother texture.
- Cocoa powder: Use good quality Dutch-processed cocoa. It’s smoky and rich, really deepens the color and flavor.
- Red food coloring: Bright gel works best—just a few drops for that startling hue. Liquid turns the batter watery.
- Buttermilk: An essential tang that keeps the cake moist and tender. Swap with sour cream if needed, but not yogurt, it’s too tangy.
- Vinegar: Brings a subtle lift and enhances the color. Apple cider vinegar is my go-to—smoky and sharp.
- Oil: Neutral-flavored vegetable oil keeps the crumb soft. Avoid olive oil—it’s too heavy here.
- Eggs: Room temperature helps them whip in smoothly, locking in air for lightness.
- White vinegar: Adds a little extra zing, makes the crumb delicate. Skip if you prefer a milder flavor.
- Vanilla extract: A splash rounds out the flavors with a sweet, floral note. Don’t skip this part.
My Blood-Red Velvet Cake Ritual: From Mix to Slice
Equipment & Tools
- Mixing bowls: For dry and wet ingredients, keep everything organized.
- Electric mixer: Whisks air into the batter, making it light and fluffy.
- 9-inch round cake pans: I prefer straight-sided for clean layers.
- Parchment paper: Keeps cakes from sticking and makes stacking easier.
- Cooling racks: For even cooling, prevents sogginess.
Mise en place
- Butter and flour the pans, prep parchment.
- Measure out all ingredients, keep them within reach.
- Preheat oven to 180°C (350°F).
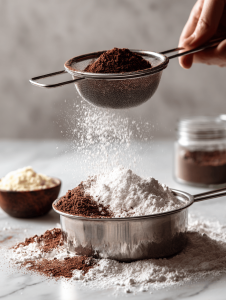
- Mix dry ingredients separately, then sift together.
- Bring eggs, buttermilk, oil, and vanilla to room temp.
Steps
- Mix dry ingredients in a bowl—flour, cocoa, sugar, salt.
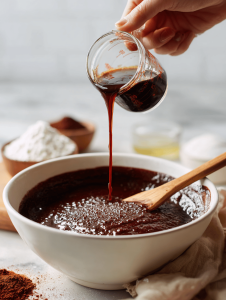
- In another, beat eggs, oil, buttermilk, vanilla, and vinegar until smooth—about 2 mins.
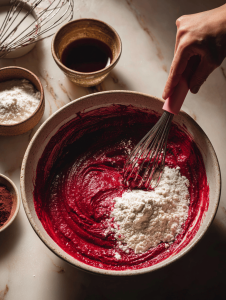
- Slowly add dry to wet, mix just until combined—don’t overmix.
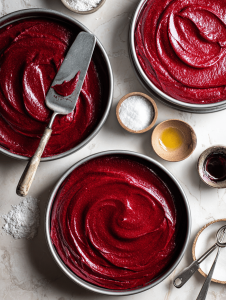
- Add food coloring last, stir until evenly red—be bold, it’s the showstopper.
- Divide batter evenly into pans—use a scale if needed.
- Bake for 25-30 mins, until a toothpick comes out clean—edges should be firm.
- Cool in pans 10 mins, then turn onto racks. Let cool completely.
- Level the tops with a serrated knife—smooth layers for stacking.
Rest & Finish
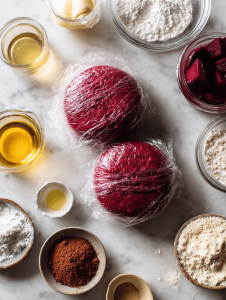
Wrap cakes in plastic, chill for at least 2 hours. This makes layering easier and flavors meld.
Frost with cream cheese or buttercream, keep it simple. Chill again before serving for neat slices.
How to Know It’s Ready
- Cake should be firm, not jiggly when gently pressed.
- Color should be deep and vibrant—no streaks or raw batter visible.
- Toothpick comes out clean—no wet crumbs.
OOPS Moments & How to Fix Them
- FORGOT to preheat? Oven needs at least 10 mins to reach temp—wait before baking.
- DUMPED too much food coloring? Add a touch more batter to balance the hue.
- OVER-TORCHED edges? Cover with foil, turn down oven, keep an eye.
- CAKE sinking in the middle? Underbaked, give it 5 more mins.
Quick Kitchen Rescue & Smart Swaps
- When batter is too thick, splash in a spoon of buttermilk to loosen.
- When frosting cracks, patch with a warm, soft spatula.
- Shield edges with foil if they start to over-brown.
- Five seconds rescue: wipe crumbs with a damp cloth for neat layers.
- Pan swap: use a springform for easier removal and a sleek look.
As the last crumb settles, I often find myself lingering over a slice, the crimson glow still shimmering. It’s not just a cake, but a quiet rebellion—something vivid and fleeting in the quiet corners of my kitchen.
Maybe that’s why I keep making it. It reminds me that beauty, chaos, and a little bit of darkness can come together in the sweetest way.
Blood-Red Velvet Cake
Ingredients
Equipment
Method
- Preheat your oven to 180°C (350°F). Butter the cake pans and line them with parchment paper to prevent sticking. Measure out all ingredients and keep them nearby.

- In a large bowl, whisk together the flour, cocoa powder, superfine sugar, raw sugar, and salt until evenly combined. This creates a uniform dry mixture.
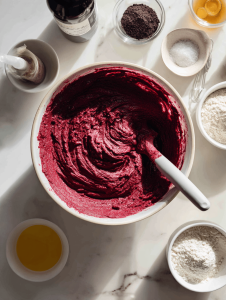
- In a separate bowl, beat the eggs, oil, buttermilk, white vinegar, and vanilla extract with an electric mixer until smooth and slightly frothy, about 2 minutes. The mixture should be well blended and fragrant.
- Gradually add the dry ingredients into the wet mixture, mixing on low speed just until combined. Avoid overmixing to keep the batter light and airy.
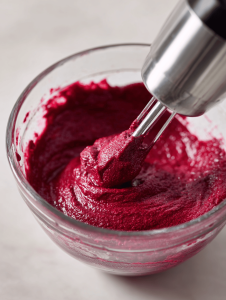
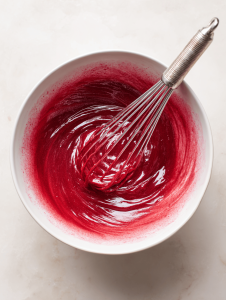
- Stir in the red gel food coloring, adding drops until you achieve a bold, vibrant crimson hue. Mix thoroughly until the color is evenly distributed—batter will turn a deep red.
- Divide the batter evenly between the prepared cake pans, smoothing the tops with a spatula to ensure even layers.
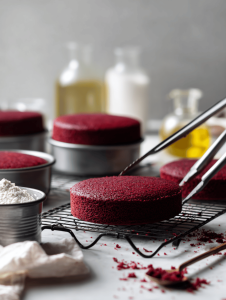
- Bake in the preheated oven for 25 to 30 minutes, until the edges are firm and a toothpick inserted into the center comes out clean. The cake will rise and develop a deep red color.
- Remove the cakes from the oven and let them cool in the pans for about 10 minutes. Then, carefully invert onto cooling racks and peel off the parchment paper. Allow the layers to cool completely before frosting.
- Use a serrated knife to level the tops of each cake layer for a smooth, even surface, perfect for stacking.
- Once chilled and leveled, spread your favorite frosting, such as cream cheese or buttercream, between the layers and over the top. Chill the assembled cake for at least 2 hours to set the frosting and deepen the flavors.
- Slice to reveal the vibrant crimson interior, and enjoy the moist, tender crumb with its hint of cocoa and tangy buttermilk. Serve and savor this striking, decadent cake.

In the end, blood-red velvet feels like more than just a dessert. It’s a tiny act of defiance, a splash of color in a world that often prefers beige. The process of baking it—messy, loud, imperfect—makes the final slice all the more satisfying.
There’s a kind of quiet joy in sharing a piece of this cake, in watching the deep red crumble on a plate. It’s not about perfection, but about embracing the chaos and finding beauty in the unexpected. That’s what makes this cake worth every crumb.