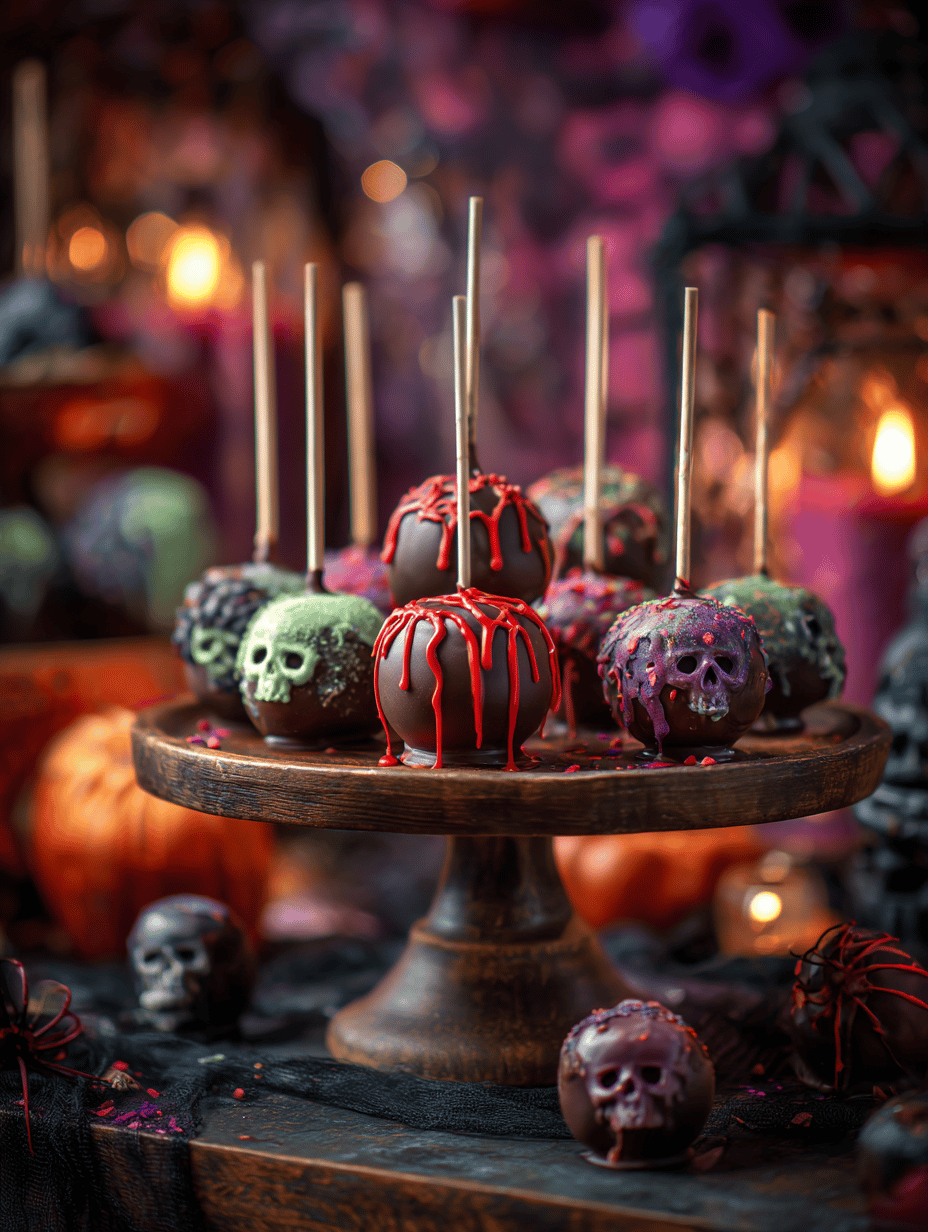
Every October, my kitchen turns into a cluttered playground of chocolate, sprinkles, and sticky fingers. This year, I decided to take a different route—no fancy frosting, just pure, unpretentious cake on a stick, dressed up for the holiday. It’s a chaotic little project, but somehow, that’s what makes it fun.
These Halloween cake pops aren’t about perfection—they’re about memories. Little hands will love to dip, decorate, and gobble them up. And honestly, nothing beats that sweet, chocolatey smell filling the house when you’re knee-deep in treats and tricks.
Plus, they’re a sneaky way to get kids excited about baking. No fuss, just a handful of ingredients, some imagination, and a bit of messy magic. Perfect for a spooky weekend when everyone needs a little sweet distraction.
Why I Keep Coming Back to These Little Creepy Confections
- Joy of creating something spooky and sweet in under an hour, chaos included.
- Relief from the usual: no complicated piping, just fun dips and sprinkles.
- Memories of childhood Halloweens blending into my kitchen chaos.
- Feeling proud when kids’ eyes light up at the sight of these tiny monsters.
- Pure nostalgic thrill, biting into a treat that feels like a mini Halloween.
The Secret Ingredients Behind the Spookiness
- Chocolate chips: I use dark, oozing chocolate for a rich, smoky flavor that melts perfectly. Swap with white chocolate for a sweeter, milder taste.
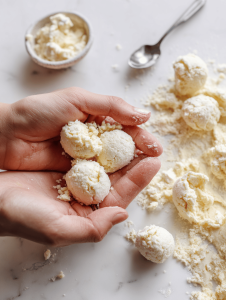
- Cake crumbs: Leftover cake is gold here. If none, sponge cake works well—just crumbled fine, not too dry.
- Crème cheese: Adds a tangy richness that balances sweetness. Skip if dairy is an issue, but don’t skip the flavor.
- Sprinkles & edible eyes: I love vibrant sprinkles and tiny edible eyes for that spooky sparkle. Use mini chocolate chips for a more sinister look.
- Candy melts: Bright, glossy coatings that set fast. For a softer shell, try melted white chocolate or caramel.
- Decorative candies: Think mini marshmallows, pretzels, or even crushed cookies for texture and surprise.
- Food coloring: Brights for monsters, darks for ghosts. Use sparingly—less is more for a spooky vibe.
Crafting Your Creepy Cake Pops: A Step-by-Step Nightmare (or Dream?)
Equipment & Tools
- Candy thermometer: Keep your coating at the right temp, avoid burnt chocolate.
- Skewers or lollipop sticks: For easy handling and presentation.
- Mixing bowls & spatulas: For blending and melting.
- Cooling rack: To set your pops without mess.
- Decorating brushes & tweezers: For precise eyes and tiny details.
Mise en place
- Crumb leftover cake or bake a small batch, then cool completely.
- Line up all your decorating candies, sprinkles, and food colorings.
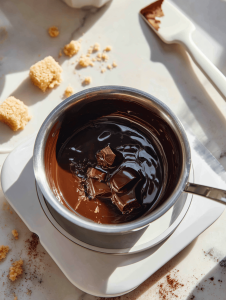
- Melt chocolate or candy melts, keeping at 45°C (113°F) for glossy coating.
- Prepare your sticks and set aside.
- Get your workspace tidy—mess is part of the fun, but chaos can be a killer.
Steps
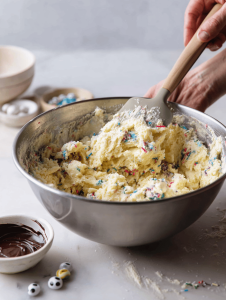
- Mix cake crumbs with softened cream cheese until you get a firm, moldable dough. About 2-3 minutes.
- Roll into small balls, about 2 teaspoons each. Chill for 15 minutes, or until firm.
- While chilling, melt chocolate in a double boiler or microwave in 30-second bursts, stir until smooth.
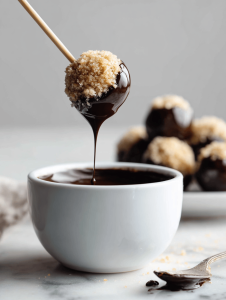
- Dip each stick into melted chocolate, then insert into a cake ball. Freeze for 10 minutes.
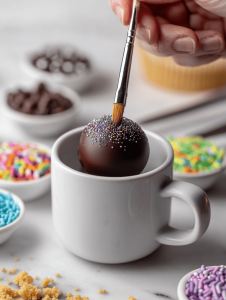
- Re-melt chocolate if needed, then dip each cake pop, turning gently for an even coat. Let excess drip off.
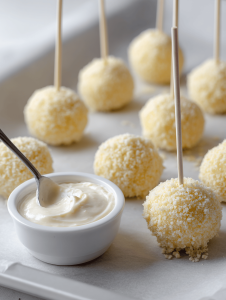
- While coating sets, prepare faces or monsters with candies and edible eyes. Use a small brush for details.
- Insert decorations while coating is still tacky, about 10-15 minutes, until firm.
- Place pops on a cooling rack, let sit for 30 minutes at room temp.
Resting & Finishing
Let the cake pops rest until the coating feels crisp and shiny. Store in a cool, dry place until ready to serve or pack away.
Checkpoints & How to Know It’s Done
- Chocolate coating is glossy and set, no sticky spots.
- Ingredients feel firm but not hard, give a gentle jiggle.
- Decorations stay put when touched lightly.
Oops Moments: How to Fix Your Spooky Mischief
- FORGOT to chill cake balls? Pop them in the fridge for 10 minutes to firm up.
- DUMPED too much chocolate? Reheat gently, then stir in a teaspoon of coconut oil for shine.
- OVER-TORCHED coating? Drench with a little warm cream, remix, and dip again.
- CRACKS in coating? Warm slightly and smooth with a spatula or finger dipped in hot water.
Kitchen Hacks for Last-Minute Magic
- When coating is thick or lumpy, splash in a few drops of vegetable oil to loosen.
- Patch cracks with melted white chocolate or edible glue for a seamless look.
- Shield delicate decorations with a light dusting of edible shimmer spray.
- When in doubt, quick dip in warm chocolate hides all sins.
- Spritz a tiny bit of cooking spray on your hands to prevent sticking while decorating.
These little cake pops are more than just treats—they’re a chaotic celebration of childhood memories and spooky spirit. When you finally see those tiny monsters lining up on your plate, you’ll realize how much fun messes can be. Maybe next year, I’ll add some glow-in-the-dark icing, but for now, these are perfect for a quick, joyful Halloween fix.
And honestly, the best part? Watching everyone’s faces light up when they bite into those tiny, sweet, spooky bites. It’s a messy, happy chaos—just how October should be.
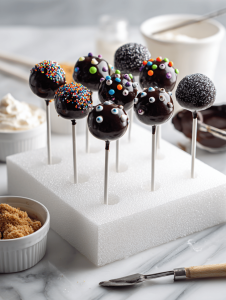
Halloween Cake Pops
Ingredients
Equipment
Method
- Mix the crumbled cake with softened cream cheese until you get a firm, moldable dough that holds together when pressed.
- Roll the mixture into small balls, about 2 teaspoons each, then place them on a baking sheet lined with parchment paper.
- Chill the cake balls in the refrigerator for at least 15 minutes until firm and easy to handle.
- While chilling, melt the candy melts or chocolate in a double boiler or microwave, heating in short bursts and stirring until smooth and glossy.
- Dip each lollipop stick into the melted chocolate, then insert into a chilled cake ball, pressing gently to secure.
- Place the assembled cake pops back in the freezer for 10 minutes to set the sticks and firm up the cake balls.
- Reheat the remaining melted chocolate if needed, then dip each cake pop into the coating, turning gently to get an even, glossy shell. Let excess chocolate drip off.
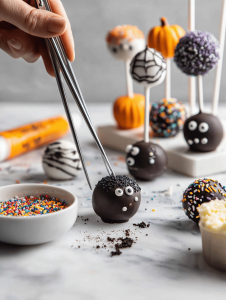
- While the coating is still tacky, decorate the cake pops with sprinkles, edible eyes, or other candies to create spooky faces and features.
- Place the decorated cake pops on a cooling rack and let them sit at room temperature for about 30 minutes until the coating is crisp and shiny.

Notes
There’s no denying that Halloween is about surprises—some good, some delightfully creepy. These cake pops fit right into that tradition, bringing a little whimsy and a lot of sugar to your spooky night. When the house fills with the smell of melted chocolate and giggles, you know you’ve done something right.
In the end, it’s not about perfect shapes or flawless faces. It’s about the joy of creating, the chaos of decorating, and the simple pleasure of sharing something homemade. So, gather your ingredients, embrace the mess, and let the kids (and you) have a little spooky fun—because that’s what Halloween really tastes like.