There’s a certain thrill in turning a simple donut into something unexpectedly spooky and fun. I first stumbled upon the idea during a late-night snack run, realizing how the swirls and loops could mimic a spider’s web. It’s a small, quirky project that feels like a secret code only the kitchen knows how to crack.
This recipe is more than just a treat; it’s a conversation starter. Perfect for Halloween or a themed party, but honestly, I keep making them just because they’re so delightfully weird and satisfying to decorate. The best part? Watching the dough come together into a glossy, pillowy mass that’s begging to be shaped into tiny webs.
Don’t be fooled by the playful look—these donuts pack a punch of rich vanilla and deep-fried goodness. They’re simple enough for a weekend project, but the little details make them stand out. Plus, the smell of fresh fried dough with a hint of sugar fills your kitchen with a nostalgic buzz.
Why I Love This Trick: Memories in Every Web
- Making these brings back childhood memories of candy-coated nights and costume parties.
- I love how easy it is to transform a basic donut into a creepy-crawly masterpiece.
- The satisfaction of piping the web and watching it crackle as it cools is pure joy.
- Decorating them feels like crafting tiny edible art—so playful and freeing.
- They turn an ordinary snack into a conversation piece, perfect for sharing and giggling over.
Ingredient Tales: Every Piece Counts
- Flour: I use all-purpose because it’s reliable and gives a soft crumb—you can swap in half whole wheat for a nuttier touch.
- Sugar: White granulated makes for a clean sweetness—try brown sugar if you want a deeper, caramel note.
- Yeast: Active dry yeast is my go-to—if you prefer instant, skip the proofing step, but make sure it’s fresh.
- Eggs: They bring richness and structure—if you’re out, a flaxseed egg works in a pinch, but the texture shifts.
- Oil: Neutral oil keeps the donuts light—smoky or toasted sesame oil adds an unexpected twist if you’re feeling adventurous.
- Vanilla: The bright aroma lifts the dough—substitute almond extract for a nutty, fragrant kick.
- Frosting & Web: I love royal icing for its crackly finish, but melted chocolate works just as well—look for that oozy, glossy surface.
Web-Worthy Steps: How These Spiders Come to Life
Equipment & Tools
- Deep-fryer or heavy-bottomed pot—keeps the oil steady and at the right temp.
- Thermometer—crucial for maintaining oil temperature around 180°C / 350°F.
- Piping bags with small round tips—makes the web lines precise and fun.
- Cooling rack—prevents sogginess and helps the donuts set.
- Mixing bowls and whisk—basic prep gear for dough and icing.
Mise en Place
- Measure out all dry ingredients and set aside.
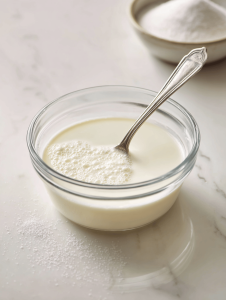
- Warm the milk slightly, then proof the yeast until frothy, about 5 minutes.
- Crack eggs and prepare vanilla extract.
- Heat oil to 180°C / 350°F, ready for frying.
- Prepare piping icing in a piping bag fitted with a small round tip.
Steps
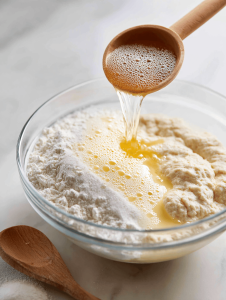
- Mix dry ingredients in a bowl. Add warm milk, eggs, vanilla, and oil. Stir until smooth.
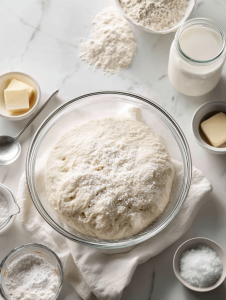
- Knead for 5 minutes until dough is shiny and elastic. Cover and let rise for 1 hour.
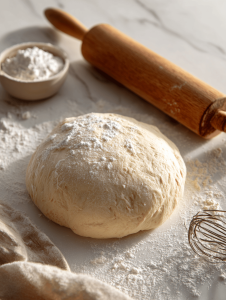
- Roll out dough to about 1 cm thick. Cut into small rounds with a cookie cutter.
- Heat oil in a deep pan, test with a small piece—should crackle immediately.
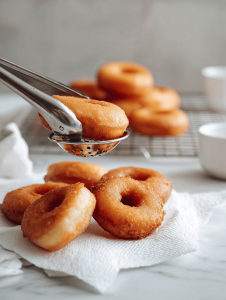
- Fry donuts in batches, 2-3 minutes each side, until golden brown. Flip carefully.
- Drain on paper towels. Cool slightly before decorating.
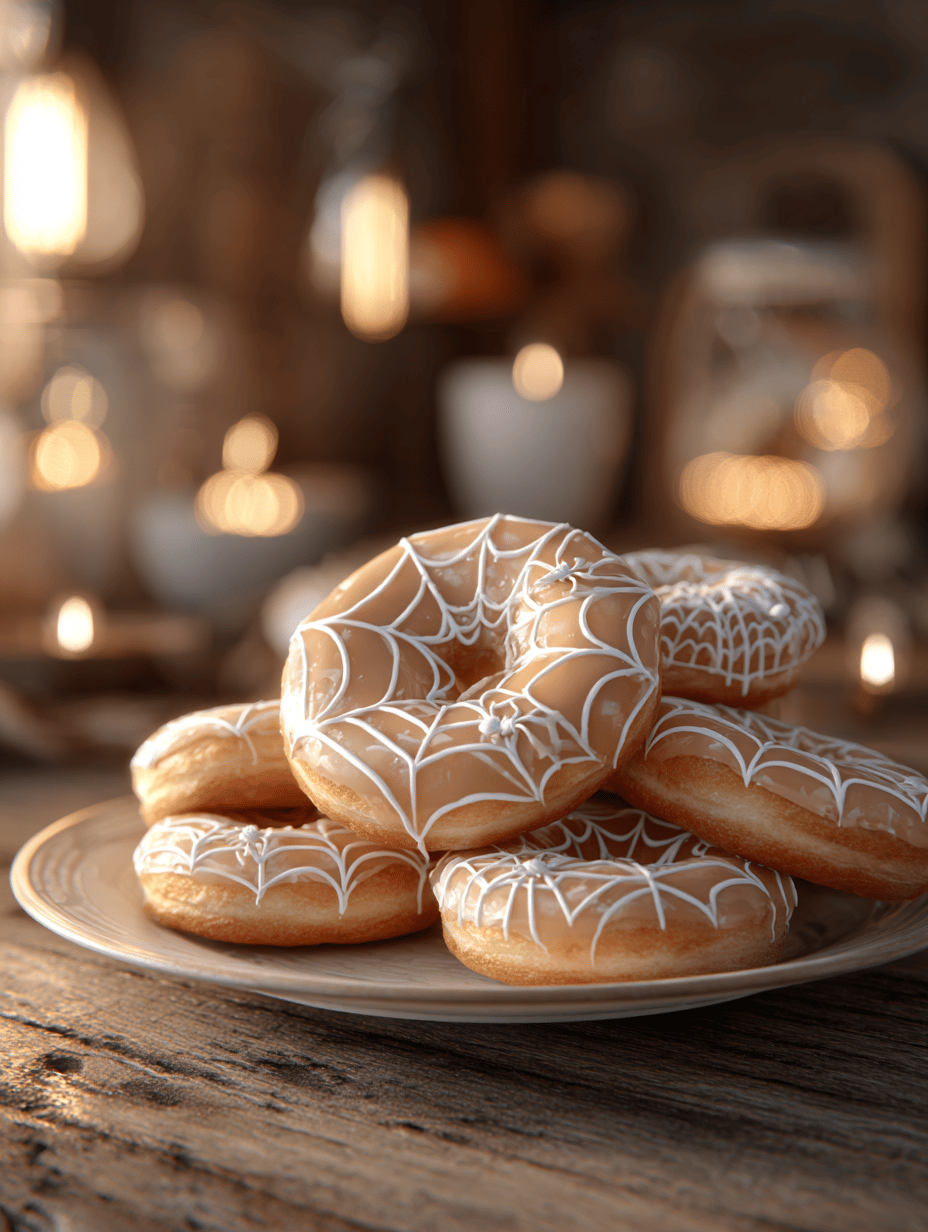
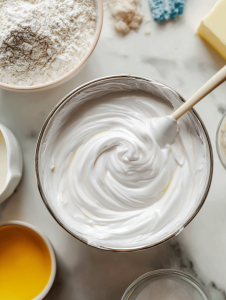
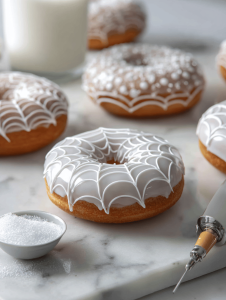
- Fill piping bag with royal icing. Pipe web lines in a crisscross pattern for a spooky effect.
- Let icing set for about 15 minutes. Decorate with tiny edible eyes if desired.
Rest & Finish
Rest donuts on a wire rack. Once decorated, they’re best enjoyed within a few hours for crispness and web crackle.
Knowing It’s Done
- Donuts turn golden and puffed—internal temp around 90°C / 194°F.
- Web icing crackles and sets—no sticky or runny spots.
- Fried surface is firm but not hard—perfect crunch with a soft interior.
Ouch Moments & How to Fix Them
- FORGOT to proof yeast? Warm a little more milk, add yeast, and wait 5 minutes.
- DUMPED dough too sticky? Knead in a touch more flour until manageable.
- OVER-TORCHED donuts? Lower the heat, remove early, and drain immediately.
- UNSURE about oil temp? Use a thermometer and keep it steady at 180°C / 350°F.
Kitchen Hacks for Webbing & Cracking
- When icing cracks, splash with a tiny amount of warm water and remix.
- Patch small web tears with a dab of icing before it sets.
- Shield donuts from humidity—store in a cool, dry place.
- When webbing looks dull, brush with a little edible shimmer for a shimmer.
- Pantry swap: swap vanilla for lemon zest for a zingy surprise.
These spiderweb donuts feel like a secret weapon for playful baking. They’re messy, charming, and a little spooky—just what makes baking worth sticking to. Plus, watching friends’ faces when they see a tiny web on a donut is priceless.
In the end, it’s all about having fun with the process. Maybe next time I’ll try black food coloring in the icing or add a few edible spider candies. Whatever you do, these little webby bites will keep everyone guessing—and giggling—at the table.
Spooky Web-Themed Donuts
Ingredients
Equipment
Method
- In a mixing bowl, combine the sifted flour and sugar. Warm the milk slightly and proof the yeast in it until frothy, about 5 minutes.
- Add the proofed yeast mixture, egg, vanilla extract, and oil to the dry ingredients. Stir until a sticky, glossy dough forms.

- Knead the dough on a floured surface for about 5 minutes until smooth and elastic. Cover with a damp cloth and let it rise in a warm spot for 1 hour, until doubled in size.
- Once risen, roll out the dough to about 1 cm thickness on a floured surface. Use a small round cutter to cut out donut shapes or circles.
- Heat the oil to 180°C (350°F) in a deep pan or fryer. Carefully slide in a small piece of dough to test if it bubbles and sizzles, indicating the right temperature.
- Fry the donuts in batches for 2-3 minutes per side, until golden brown and puffed up. Flip gently with a slotted spoon to ensure even cooking.
- Remove the donuts from the oil and drain on a paper towel or cooling rack. Allow them to cool slightly so the icing won’t melt immediately.

- Fill a piping bag fitted with a small round tip with royal icing or melted chocolate. Pipe web patterns across the donuts in a crisscross fashion for a spooky web look.
- Let the web icing set for about 15 minutes. Add tiny edible eyes if desired to enhance the creepy effect.

- Place the decorated donuts on a wire rack and serve once the web pattern has cracked and set. Enjoy these playful treats with friends or family!
Notes
Every batch of these spiderweb donuts is a reminder that baking doesn’t have to be perfect to be memorable. The joy is in the details—the cracks, the glistening icing, the surprised smiles. They’re a small, mischievous project that can turn a simple weekend into a celebration.
And honestly, once you get the hang of piping those webs, it’s hard not to smile at the chaos of it all. They’re a reminder that sometimes, the best moments are the ones that don’t go exactly as planned. Keep the camera ready, and enjoy the messy, sweet ride.