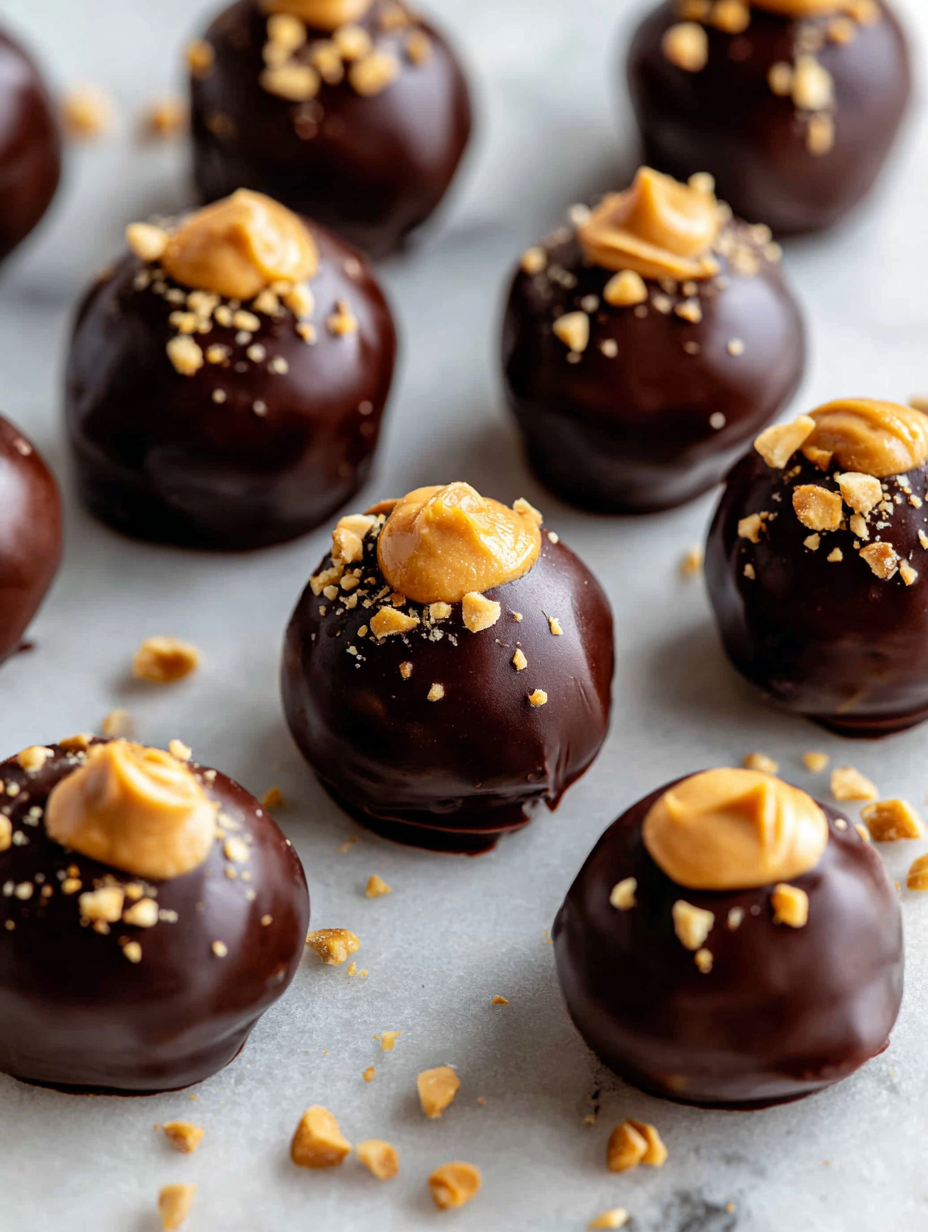
These chocolate peanut butter truffles are all about that instant textural joy—crisp shell giving way to a silky, almost gooey center. I love how simple ingredients can surprise you with such a complex feel in your mouth. It’s like a little secret between you and each bite, a contrast that keeps you reaching for more.
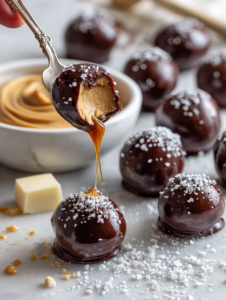
What really makes these truffles special is the way the crunch and creaminess dance together. That crisp chocolate shell cracks satisfyingly when you bite in, revealing a luscious peanut butter center that’s just barely firm enough to hold shape but melts smoothly on the tongue. It’s the kind of treat that makes you want to pause and savor every moment.
I’ve made these a dozen times, tweaking the shell thickness and peanut butter richness, but the magic is in that crunch-to-melt combo. They’re perfect for when you want a quick, satisfying dessert that feels fancy but is actually dead simple to pull together. Plus, they hold up well in the fridge, so you can make them ahead and still have that perfect bite ready whenever the craving hits.
Focusing on the texture contrast — how the creamy, melt-in-your-mouth center is complemented by a crisp chocolate shell, making each bite an experience of smooth and crunchy in harmony.
This recipe matters to me because it’s one of those rare treats that combines nostalgia with a little bit of indulgent chaos. I love how the crunchy chocolate shell hides that creamy peanut butter center—it’s like biting into a childhood memory but with a grown-up twist. Making these truffles is almost meditative, each step a small act of comfort and creativity, especially when I want something sweet and satisfying without a fuss.
- Biting into these truffles instantly takes me back to childhood cookie jars and lazy Sunday afternoons.
- The way the crisp chocolate shell shatters, revealing that gooey peanut butter center, is pure satisfaction—like a tiny celebration with each bite.
- Making these feels like a small act of rebellion—rich, indulgent, but so simple to pull together on a whim.
A Little Bit of Chaos Turned Sweet
- This recipe was born out of a lazy weekend craving for something that felt both decadent and manageable. I wanted that satisfying crunch with a rich peanut butter core, but I didn’t want to fuss with molds or tempering chocolate. So, I just started experimenting with what I had — a handful of chocolate, some peanut butter, and a hope to get it right.
- The first batch was a mess—too soft, too sweet, but it had that promising contrast I was after. Over time, I figured out the perfect ratio and a quick chilling method that made these truffles hold their shape without losing that melt-in-your-mouth feel. Now, they’re my go-to for when I need a little sweet escape, no fancy equipment required.
- heading
- story_type
Sweet History of Chocolate and Peanut Butter
- Chocolate and peanut butter have a long-standing partnership, dating back to 1920s American candy bars like Reese’s Peanut Butter Cups.
- These truffles are believed to have originated in home kitchens as a quick way to elevate simple ingredients into a fancy-looking treat.
- The concept of rolling sweet fillings into balls and coating them in chocolate dates back to European confections of the 19th century.
- Peanut butter’s rise in popularity in the US during the early 20th century made it a natural pairing with chocolate for sweet snacks.
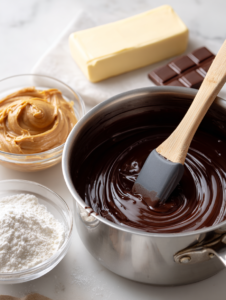
Ingredient Breakdown: What Makes These Truffles Sing
- Chocolate: I prefer a good quality dark chocolate—rich, slightly bitter, with that satisfying snap. If you only have milk chocolate, it’ll still work, but the flavor is softer and sweeter.
- Peanut Butter: Creamy peanut butter is my go-to for that velvety, melt-in-your-mouth center. If you want a little crunch, try adding chopped roasted peanuts or use chunky peanut butter instead.
- Butter: A splash of butter in the chocolate helps it melt smoothly and creates a glossy shell. Skip it if you want a firmer coating, but the shine won’t be quite as luscious.
- Powdered Sugar: I add just enough to sweeten and smooth the peanut butter mixture. If it feels too sticky, sprinkle in a little more sugar or a touch of milk to loosen it up.
- Cocoa Powder: For that deep chocolate flavor in the coating, I sift it directly into melted chocolate. If you want a less intense cocoa punch, reduce the amount or skip it for a smoother shell.
- Optional Toppings: Finishing with flaky sea salt or crushed nuts adds a lovely contrast. I keep it simple, but a tiny pinch of cayenne can add a surprising kick if you’re feeling daring.
Highlighting the Key Ingredients
Chocolate:
- I prefer a good quality dark chocolate — rich, slightly bitter, with that satisfying snap. If you only have milk chocolate, it’ll still work, but the flavor is softer and sweeter.
- Peanut Butter: Creamy peanut butter is my go-to for that velvety, melt-in-your-mouth center. If you want a little crunch, try adding chopped roasted peanuts or use chunky peanut butter instead.
Peanut Butter:
- Creamy peanut butter is my go-to for that velvety, melt-in-your-mouth center. If you want a little crunch, try adding chopped roasted peanuts or use chunky peanut butter instead.
- Chocolate: I prefer a good quality dark chocolate—rich, slightly bitter, with that satisfying snap. If you only have milk chocolate, it’ll still work, but the flavor is softer and sweeter.
Ingredient Substitutions for Customizing Your Truffles
- Dairy-Free: Use coconut oil instead of butter in the chocolate coating. It may add a slight coconut aroma but keeps it dairy-free and glossy.
- Peanut Butter: Swap creamy peanut butter for almond or cashew butter for a different nutty flavor and smoother texture, though it may alter the classic peanut taste.
- Sweetener: Replace powdered sugar with honey or maple syrup for a more natural sweetness and slightly different texture; reduce quantity to prevent stickiness.
- Chocolate: Use milk chocolate instead of dark for a sweeter, softer shell; or try a vegan chocolate for dairy-free options.
- Add-ins: Mix in chopped roasted nuts, dried cranberries, or sea salt flakes into the peanut butter center for added texture and flavor contrast.
- Cocoa Powder: Substitute with carob powder for a caffeine-free, slightly sweeter alternative with a similar deep flavor.
- Toppings: Decorate with crushed cookies, sprinkles, or edible gold for special occasions or a more festive look.
Equipment & Tools
- Double boiler or microwave-safe bowl: For melting chocolate gently without burning.
- Mixing bowl: To combine peanut butter and other ingredients.
- Small spoon or scoop: For portioning and shaping the peanut butter balls.
- Baking sheet with parchment: To set the truffles and prevent sticking.
- Fork or skewer: To dip and coat the balls in chocolate.
Step-by-Step Guide to Perfect Chocolate Peanut Butter Truffles
- Equipment & Tools: Use a small saucepan for melting chocolate, a mixing bowl for the peanut butter, a spoon or small scoop for shaping, and a baking sheet lined with parchment for chilling.
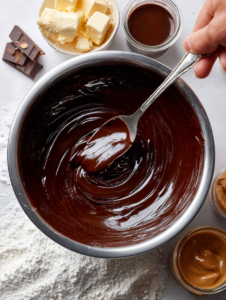
- Start by melting 200g of dark chocolate in a double boiler or microwave in 30-second bursts, stirring until smooth. Be careful not to overheat—chocolate can seize or burn easily.
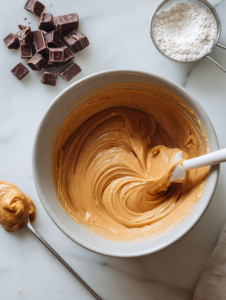
- In a separate bowl, mix 1 cup of creamy peanut butter with 2 tablespoons of softened butter and 2 tablespoons of powdered sugar until well combined and smooth. Chill for 10 minutes if too sticky to handle.
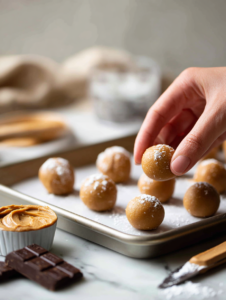
- Using a small spoon or scoop, portion out about 1 teaspoon of the peanut butter mixture. Roll into a ball with your hands, then set on the prepared baking sheet. Repeat for all the mixture, about 12-15 balls.
- Once all balls are formed, place the tray in the freezer for about 15 minutes, or until firm but not frozen solid.
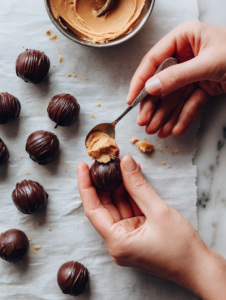
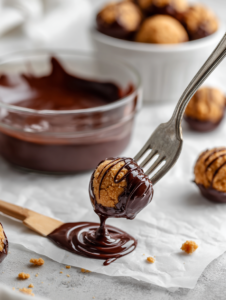
- Remove the peanut butter balls from the freezer. Using a fork or skewer, dip each ball into the melted chocolate, ensuring an even coating. Tap off excess chocolate and place back on the parchment-lined sheet.
- While the chocolate is still wet, sprinkle with flaky sea salt or chopped nuts if desired. Let the coating set at room temperature for about 30 minutes, or refrigerate for quicker setting—about 15 minutes.
- Check for doneness: The chocolate should be glossy and firm, with no sticky spots. The center should feel firm but give slightly when bitten into, revealing that creamy peanut butter core.
Allow the coated truffles to set at room temperature or in the fridge until firm. Store in an airtight container in the fridge for up to a week or freeze for longer storage. Serve at room temp for optimal texture and flavor.
How to Know It’s Done
- Chocolate coating is shiny and firm after setting.
- Truffles hold shape without cracking when gently pressed.
- Center feels slightly soft but not sticky or runny when bitten.
Chocolate Peanut Butter Truffles
Ingredients
Equipment
Method
- Start by melting the dark chocolate gently in a double boiler or microwave in short bursts, stirring until smooth and glossy. The scent of rich chocolate will fill your kitchen as it melts.
- In a mixing bowl, combine the creamy peanut butter with softened butter and sifted powdered sugar. Mix until the mixture is smooth, creamy, and uniform in texture—this will be your luscious filling.
- Once the chocolate is melted and smooth, let it cool slightly so it doesn’t melt the peanut butter mixture when combined. Pour a small spoonful of melted chocolate into your mixing bowl and stir to loosen the texture.
- Using a small scoop or spoon, portion out about a teaspoon of the peanut butter mixture. Roll it gently between your palms to form a small ball, then place each one on the parchment-lined baking sheet. Repeat until all the mixture is shaped into balls.
- Pop the tray into the freezer for 10-15 minutes, allowing the peanut butter balls to firm up just enough to handle easily without melting when dipped.
- Remove the peanut butter balls from the freezer. Using a fork or skewer, dip each into the melted chocolate, turning gently to coat evenly. Tap off the excess chocolate and place the coated truffle back on the parchment. Repeat for all the balls.
- Sprinkle with flaky sea salt or crushed nuts immediately after dipping, if desired, while the chocolate is still wet. Let the truffles set at room temperature for about 30 minutes or in the fridge for 15 minutes until the chocolate is glossy and firm.
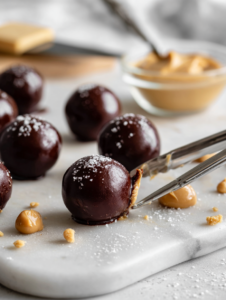
- Once set, gently pick up the truffles and admire the shiny, crack-free shell that encases the creamy, melt-in-your-mouth peanut butter center. Serve at room temperature for the best flavor and texture.
Notes
Cooking Tips & Tricks for Perfect Chocolate Peanut Butter Truffles
- Bolded Mini-Head: Melted Chocolate – Ensure the chocolate is smooth and glossy by melting it gently over low heat or in short bursts in the microwave, stirring frequently.
- Bolded Mini-Head: Chilling the Peanut Butter – Chill the peanut butter mixture just enough to make rolling easier, but not so much that it becomes too firm to handle.
- Bolded Mini-Head: Dipping Technique – Use a fork or skewer to dip the peanut butter balls into chocolate, tapping off excess to avoid drips and uneven coating.
- Bolded Mini-Head: Setting the Coating – Let the dipped truffles set at room temperature or in the fridge until chocolate is firm and shiny, about 15-30 minutes depending on thickness.
- Bolded Mini-Head: Avoiding Cracks – If the chocolate cracks when setting, gently warm the surface slightly with a hairdryer or warm towel to smooth out surface imperfections.
- Bolded Mini-Head: Enhancing Texture – For extra crunch, sprinkle chopped nuts or flaky sea salt immediately after coating while chocolate is still wet.
- Bolded Mini-Head: Storage Tips – Store the truffles in an airtight container in the fridge; let them sit at room temperature for 10 minutes before serving for best flavor and texture.
Common Mistakes and How to Fix Them
- TOO HARD: Dipped truffles are difficult to coat; soften slightly at room temperature, then re-dip if needed.
- MISTAKE: Over-chilling causes chocolate to crack; fix by gently warming slightly before handling.
- FORGOT: To temper chocolate for a glossy finish, melt to 45°C (113°F), cool to 27°C (81°F), then re-warm to 31°C (88°F).
- DUMPED: Leftover chocolate can seize if re-melted improperly; add a small amount of vegetable oil to loosen.
Quick Fixes for Common Truffle Troubles
- If the chocolate cracks when setting, gently warm the surface with a hairdryer for a smooth finish.
- When dipping, splash a little hot water into the bowl to help the chocolate flow better.
- Patch a crumbly peanut butter mixture by mixing in a teaspoon of milk or cream before shaping.
- Splash a pinch of sea salt on the chocolate coating immediately for enhanced flavor contrast.
- When in doubt, substitute dark chocolate with melting chocolate wafers for a quick fix, shimmering with ease.
Make-Ahead and Storage Tips
- You can prepare the peanut butter balls a day ahead; keep them refrigerated to maintain shape and freshness.
- Store the finished truffles in an airtight container in the fridge for up to one week; the chocolate shell will stay crisp if kept cold.
- If freezing, place truffles in a single layer on a baking sheet, then transfer to a freezer bag; they’ll keep for up to a month.
- Reheat by letting chilled truffles sit at room temperature for 10 minutes—this softens the chocolate shell slightly, enhancing that melt-in-your-mouth feel.
- For the best sensory experience, serve at room temperature; the chocolate shell will crackle satisfyingly, revealing the creamy peanut butter center.
Frequently Asked Questions about Chocolate Peanut Butter Truffles
1. Can I use other nut butters instead of peanut butter?
Yes, you can substitute smooth almond or cashew butter, but the flavor and richness will change slightly.
2. How long do these truffles last in the fridge?
Storing in an airtight container in the fridge keeps them fresh for about a week. Freezing extends their life to about a month.
3. Can I make these vegan?
Yes, melting vegan chocolate works well, but the coating might be less glossy and slightly softer.
4. What if my peanut butter mixture is too sticky to roll?
Chill the peanut butter mixture for about 10 minutes if it’s too sticky to handle comfortably.
5. Can I add toppings to the truffles?
Yes, you can add a pinch of sea salt on top after dipping for a flavor contrast and a touch of elegance.
6. What’s the best way to dip the truffles in chocolate?
Use a fork or a skewer to dip the balls in chocolate, then tap off excess for a smooth coating.
7. How do I know when the chocolate coating is set?
Allow the chocolate to set at room temperature or in the fridge for about 15-30 minutes until glossy and firm.
8. What if the chocolate cracks when setting?
If the chocolate cracks, gently warm the surface with a hairdryer for a few seconds to smooth out imperfections.
9. What kind of chocolate should I use for the coating?
Use high-quality dark chocolate with a good snap for the best coating; lower quality may result in a dull finish.
10. Should I serve the truffles cold or at room temperature?
Let the truffles sit at room temperature for 10 minutes before serving to soften the chocolate shell slightly and enhance flavor.
These truffles are a little messy to make, but honestly, that crunch and melt-in-your-mouth combo makes it all worthwhile. They remind me of childhood snacks but with a grown-up twist that feels indulgent and fun.
Whenever I make these, I think about how simple ingredients can turn into something that feels special. Plus, they’re perfect for sharing—or not sharing—if you’re feeling a little rebellious about your sweet treats. They’re a reminder that sometimes, the best desserts are the easiest to throw together but hardest to forget.