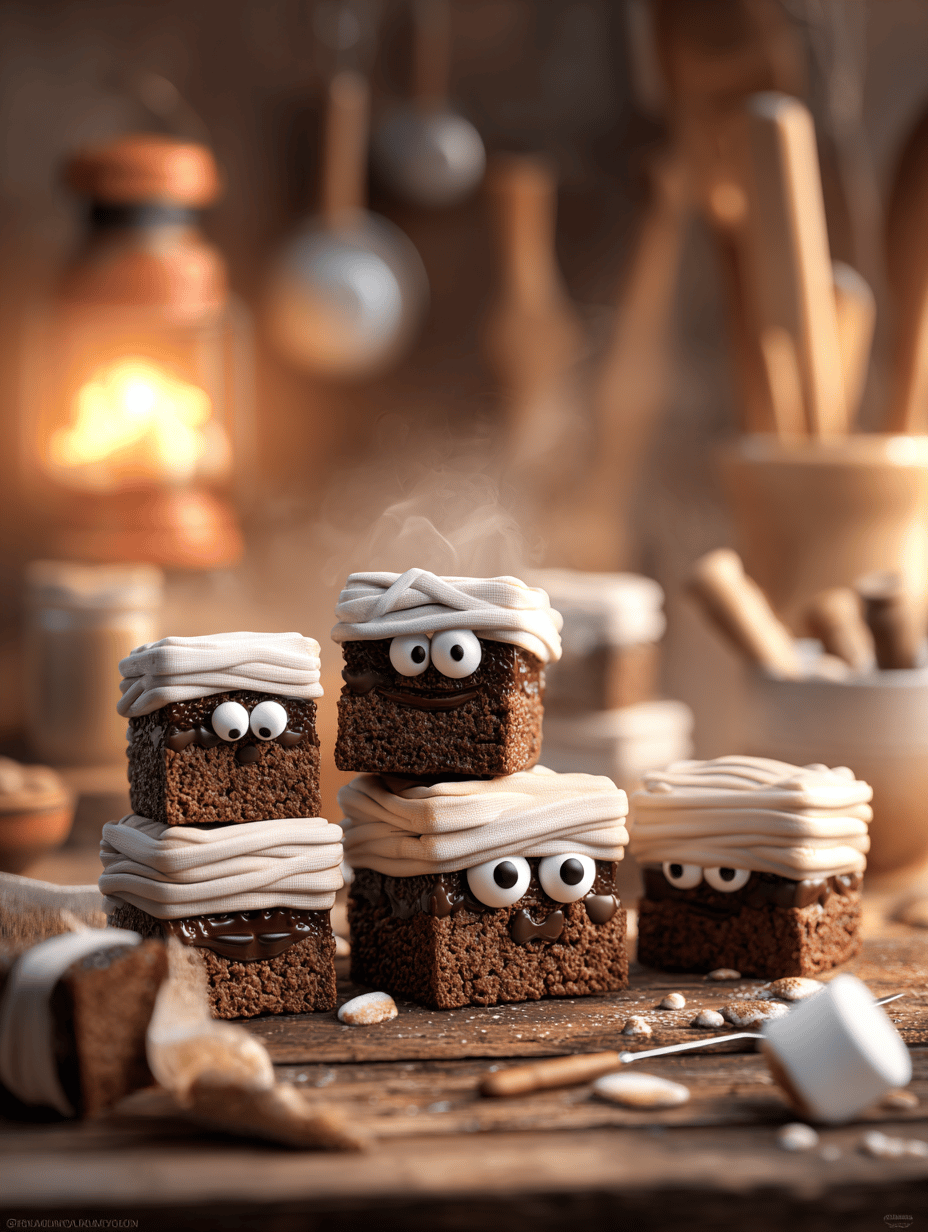
Ever since I was a kid, I’ve loved the idea of transforming classic desserts into something a little spooky. These mummy brownies are my way of blending childhood nostalgia with that thrill of Halloween. The best part? They’re so simple to whip up, even last-minute, and they make a kitchen look delightfully chaotic.
There’s a certain joy in watching the chocolate melt and turn glossy, then shaping those tiny bandages of icing into little mummies. It’s almost like crafting tiny cursed relics, but edible ones. Plus, they’re a hit at parties, especially when everyone’s craving a treat that’s creepy and cute at once.
So, gather your ingredients and get ready for a little kitchen mischief. These mummy brownies might just become your new favorite Halloween tradition—messy, fun, and totally delicious.
Why I Can’t Get Enough of These Spookily Sweet Creations
- Joy of turning a simple brownie into a tiny spooky scene—every little mummy feels like a small victory.
- Chaos of decorating—frosting and candy googly eyes scatter everywhere, and I love it.
- Relief when they come out of the oven with that perfect crackly top, ready for bandages.
- Pride in creating something that’s fun for kids and adults alike—kids love the creepy factor, adults love the nostalgia.
- Excitement in the reactions—everyone’s surprised by how cute and creepy they are.
Ingredient Tales: What’s Actually in These Creepy Little Creepers?
- *Brownie batter:* I use a rich, fudgy mix that’s gooey and oozy—swap with gluten-free if needed, just watch the baking time.
- *Chocolate chips:* Melty and smoky, they add depth—dark chocolate works best, but semi-sweet is fine.
- *Icing:* Bright white for bandages—store-bought or homemade, it needs to be stiff enough to pipe.
- *Candy googly eyes:* The real stars—glossy and slightly sticky, they give the mummies their spooky stare. If unavailable, use small round candies or melted chocolate dots.
- *Decorative sprinkles:* Optional, but I like the tiny bones or skulls for extra creepiness—add just before serving for crunch.
- *Flavor extracts:* Vanilla or almond—just a splash for that extra hint of sweetness and aroma. Skip if you prefer plain chocolate.
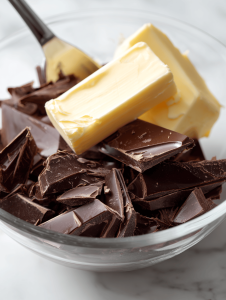
- *Butter:* Rich and smooth, helps the brownie batter spread easily. Can substitute with coconut oil for a dairy-free version.
The Art of Mummy Making: Your Step-by-Step Guide to Creepy Confections
Equipment & Tools
- 9×13 inch baking pan: for even baking
- Mixing bowls: for batter and icing
- Whisk and spatula: stir and fold smoothly
- Piping bags or plastic sandwich bags: for bandages and details
- Small round tip: to pipe icing lines
- Cooling rack: to set the brownies
Mise en Place
- Preheat oven to 180°C (350°F). Grease your pan.
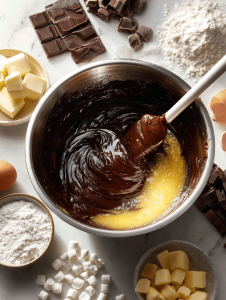
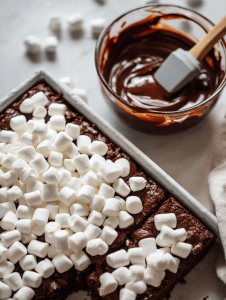
- Melt butter and chocolate chips together, then mix into batter.
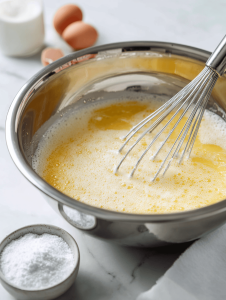
- Prepare icing by mixing powdered sugar, egg whites or meringue powder, and vanilla.
- Gather candies, eyes, and sprinkles for decorating.
- Line up piping tools and set everything within reach.
Steps
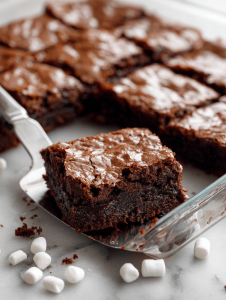
- Mix brownie ingredients, bake in the pan for 20-25 mins until a toothpick comes out moist but not wet.
- Let brownies cool completely on a rack, about 30 mins.
- Once cooled, cut into small squares—think bite-sized.
- Fill piping bags with icing. Pipe thin, uneven bandages over each brownie to mimic wrappings.
- Place two googly eyes on each mummy, pressing gently so they stick.
- Add tiny sprinkles or skulls for extra creepiness, if desired.
- Let the icing set for 15 minutes before serving; the bandages should look slightly cracked.
Rest, Finish, and Plate
Set the decorated brownies on a tray. Let them rest for 10 minutes to firm up. Serve with a side of giggles and maybe a spooky story.
How to Know When They’re Ready
- The brownies are firm and a toothpick comes out with a few moist crumbs.
- The icing is set and slightly matte—not sticky.
- The bandages have cracked just a bit, adding to the mummy effect.
Oops Moments and How to Fix Them (Because Who Doesn’t Mess Up?)
- FORGOT to cool the brownies? Pop them in the fridge for 10 mins to firm up the icing.
- DUMPED too much icing? Smooth it out with a damp finger or add more bandages.
- OVER-TORCHED edges? Trim with a sharp knife or serve as is, rustic style.
- CRACKS in icing? Lightly brush with a damp brush or pipe extra bandages to conceal.
Quick Fixes for Kitchen Crises
- When icing is too runny, add more powdered sugar until stiff.
- When brownies stick, splash a little hot water on the pan edges before slicing.
- Patch cracks by piping extra icing over imperfections.
- Shield eyes with a tiny dab of icing if they slide off.
- Smell of burnt edges? Slice away the charred bits and serve the rest.
Making these mummy brownies is a messy, funny adventure. It’s almost more about the chaos than the final look. But that’s part of the charm—each crooked bandage and googly eye adds personality.
They’re not just treats; they’re little stories in edible form. Perfect for Halloween, yes, but also a reminder that sometimes, the best moments come from the messiest kitchens.
Mummy Brownies
Ingredients
Equipment
Method
- Preheat your oven to 180°C (350°F) and grease your 9x13 inch baking pan.
- Melt the butter with the chocolate chips in a microwave or double boiler until smooth and glossy, filling your kitchen with a rich chocolate aroma.
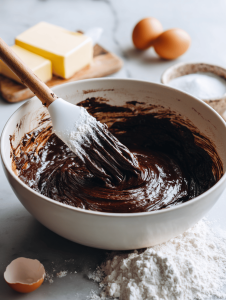
- In a large bowl, mix the brownie batter ingredients according to the box instructions, then fold in the melted chocolate mixture until well combined.
- Pour the batter into the prepared pan, spreading evenly with a spatula. Bake for 20-25 minutes until a toothpick inserted in the center comes out with moist crumbs.
- Remove the brownies from the oven and let them cool completely on a cooling rack, about 30 minutes, until firm and set.
- Once cooled, cut the brownies into small, bite-sized squares to make tiny mummies.

- Prepare the icing by mixing powdered sugar, egg whites or meringue powder, and vanilla extract until stiff and smooth. The icing should be thick enough to pipe.

- Fill piping bags or plastic sandwich bags with the icing, then pipe thin, uneven lines over each brownie to resemble wrappings. Let the icing set for about 15 minutes.
- Gently press two candy googly eyes onto each mummy brownie, pressing slightly so they stick to the icing.
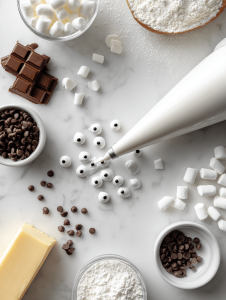
- Decorate with tiny sprinkles or skulls if desired, adding extra creepiness and crunch.
- Allow the decorated mummies to rest for 10-15 minutes so the icing can fully set and crack slightly, enhancing the mummy effect.

- Serve these spooky brownies on a platter, ready to impress with their adorable creepiness and delicious fudgy texture.
In the end, these mummy brownies are less about perfection and more about the fun. The kids love the creepy faces, and the adults love teasing about the tiny, cursed relics they’re eating. It’s funny how a simple recipe can turn into a little haunted craft session.
Next time you want a playful dessert that’s easy to customize, give these a shot. They’re a perfect excuse to get your hands a little sticky and your imagination running wild. And if all else fails, just call them “art” and pass them around—no one will notice the imperfections.