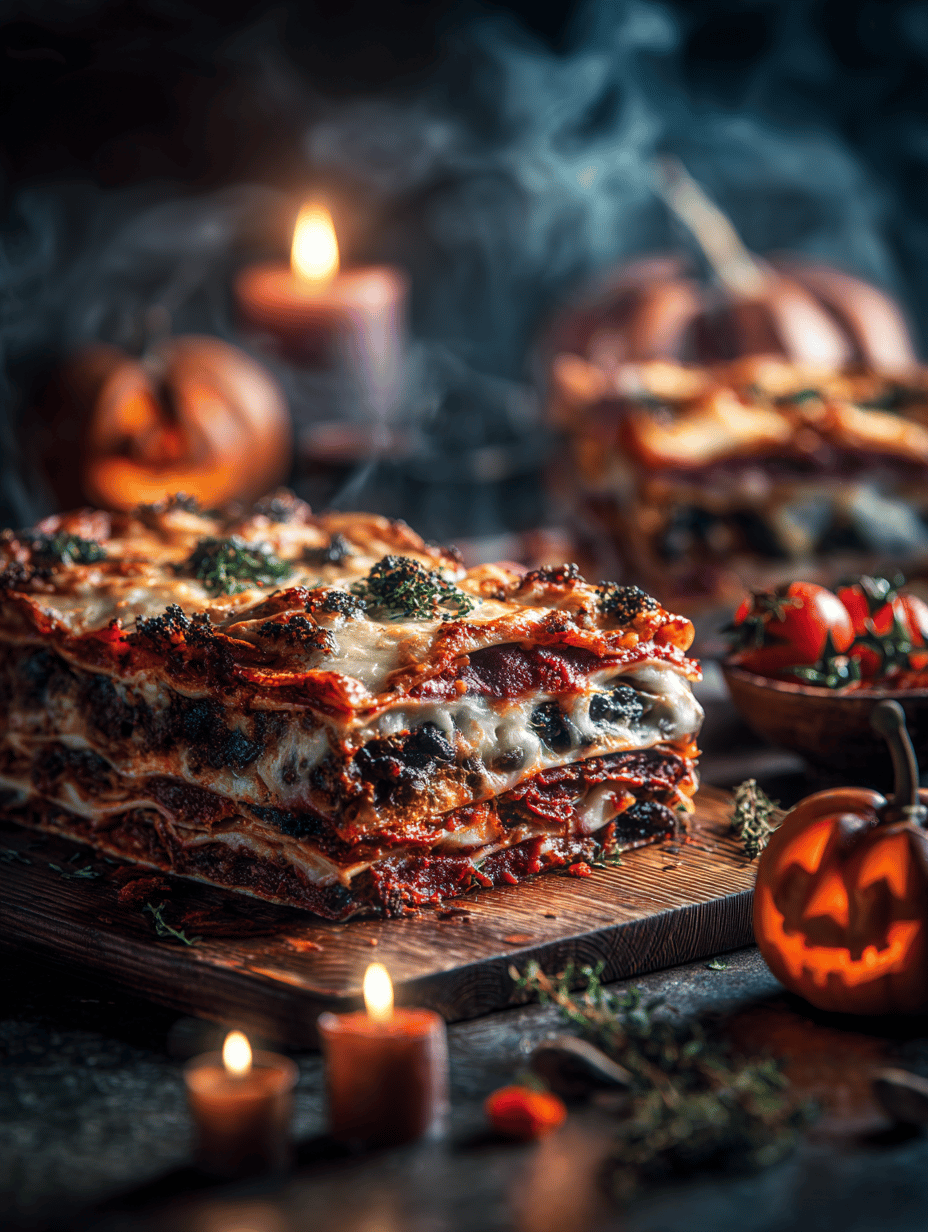
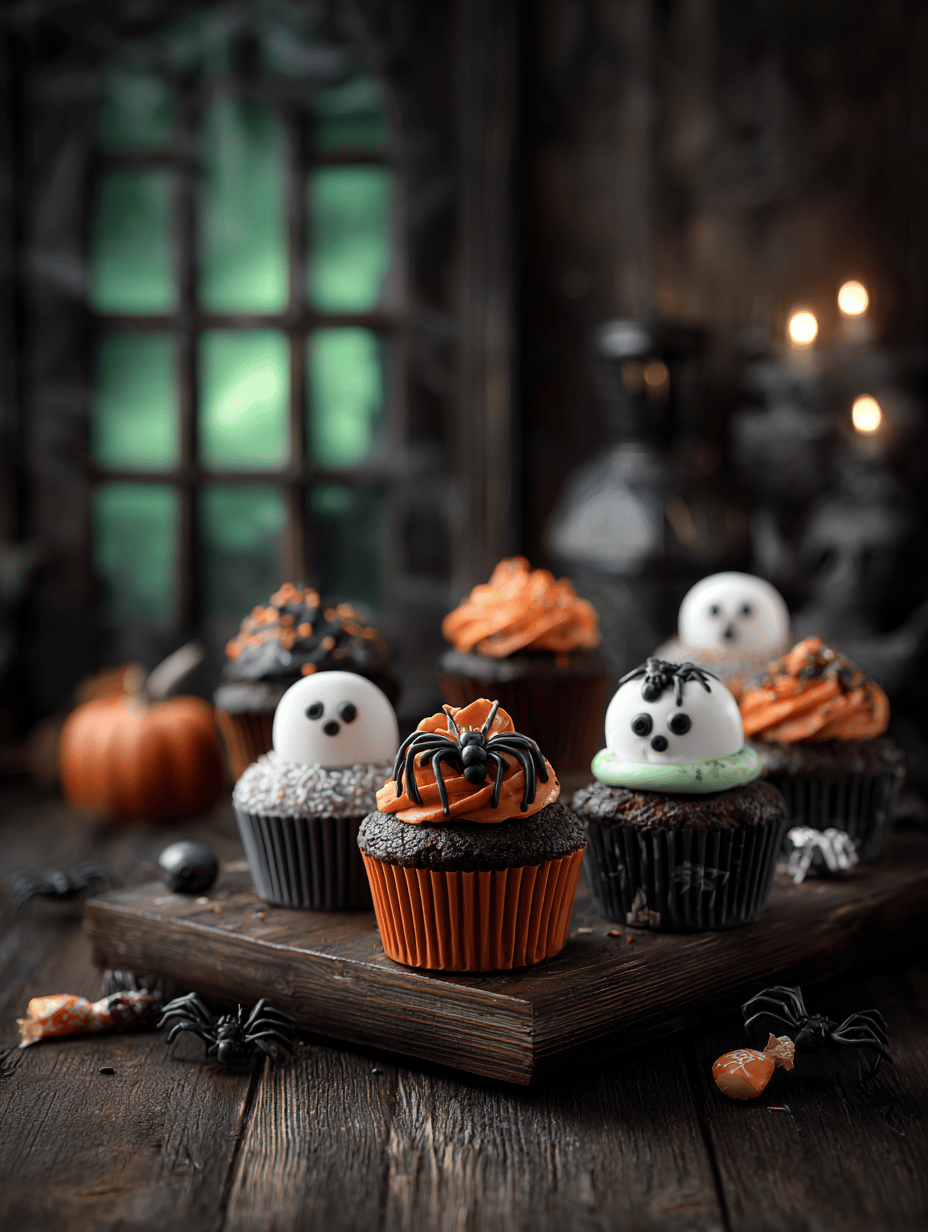
Sometimes, I get a wild idea late at night, and this was one of those times. I was craving something sweet, but with a little bit of mischief baked in—literally. These spooky cupcakes aren’t just cute decorations; they’re a playful way to turn ordinary baking into a mini Halloween celebration.
What I love most is how easy it is to customize them with whatever creepy eyes or fangs you find in the craft store. They look fancy but come together with simple ingredients and a few clever tricks. Plus, the smell of vanilla and chocolate wafting through the kitchen makes the whole house feel festive, even if it’s just for a quiet night in.
They’re perfect for a kids’ party, or just to scare your friends with a sweet tooth. No matter the reason, these cupcakes bring a bit of chaos and charm to your baking table. Just be ready for some giggles and maybe a sugar rush or two.
What I adore about these spooky cupcakes
- They remind me of childhood Halloweens, full of giggles and spooky stories, even if I’m the only one around.
- It’s satisfying to see how a simple cupcake transforms into a creepy masterpiece with a few candies and food coloring.
- The chaos of piping little mouths or eyes always makes me laugh—messy but memorable.
- They’re a fun way to use up leftover frosting—no boring cupcakes here, just spooky art.
- Every batch feels like a tiny Halloween party, even if it’s just for one person.
Breaking down the creepy ingredients
- Chocolate cake batter: I opt for dark cocoa—makes everything look more sinister and adds depth. Swap in a gluten-free mix if needed.
- Vanilla frosting: I like a smooth buttercream—bright vanilla aroma, sweet but not overpowering. Almond extract can add a smoky note if you want.
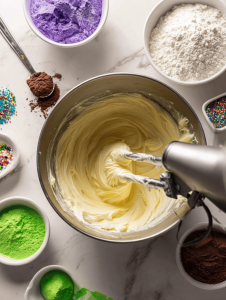
- Food coloring: Bright green, black, or blood-red—use gel for vivid colors without thinning the frosting. Use sparingly to keep the colors intense.
- Candy eyes: I grab mini edible eyes—chewy, a little salty, fun to stick on. Or make your own with white chocolate and black icing.
- Fangs and fangs: Edible sugar fangs or small marshmallows cut into sharp shapes—add a creepy bite. For a smoky effect, dust with a pinch of black cocoa powder.
- Decorative sprinkles: Use for texture—glittery, shiny, or matte—think of them as the bits of chaos that make each cupcake unique.
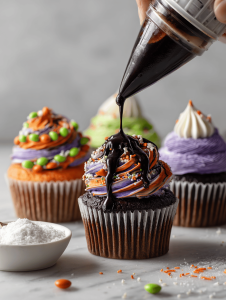
- Chocolate syrup or black gel: For drips or smudges—adding just a hint of oozy mess. Smells like rich, roasted cocoa, very satisfying.
From batter to spooky bites: my step-by-step
Equipment & Tools
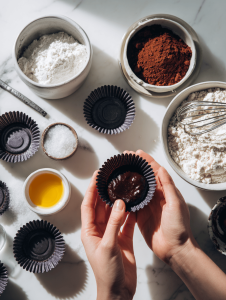
- Standard cupcake tin and liners—preferably dark or themed for the spooky vibe.
- Mixing bowls and spatulas—big enough for mixing and scraping.
- Piping bags and tips—round for frosting, small for detail work.
- Candy tweezers—helps place tiny candies precisely.
- Toothpicks—useful for detailing or adjusting shapes.
Mise en place
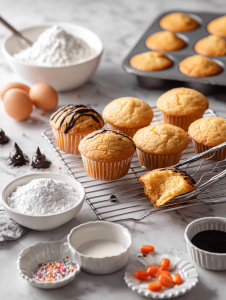
- Preheat oven to 180°C (350°F). Line cupcake tin with spooky-themed liners.
- Measure out all ingredients—cake batter, frosting, colorings, decorations.
- Prepare piping tools and stencils for fangs or eyes if needed.
- Have a damp cloth nearby for quick cleanup of messes.
- Set aside candies and decorations within reach.
The spooky process begins
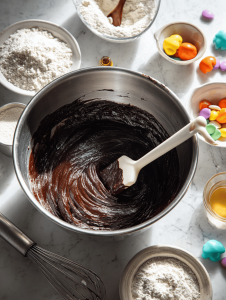
- Mix the cake batter until smooth, about 2 minutes—don’t overmix or cupcakes get dense.
- Divide batter evenly into liners—fill about 2/3 full for domed tops.
- Bake for 18–20 minutes—edges should be slightly golden, and a toothpick comes out clean.
- Let cupcakes cool in the tin for 5 minutes, then transfer to a wire rack—cool completely.
- While cooling, prepare your frosting—color it with gel to match your spooky theme.
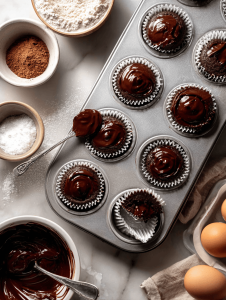
- Once cooled, pipe frosting onto cupcakes—use different tips for textures.
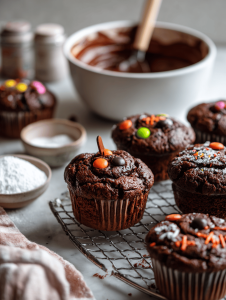
- Decorate with candies, fangs, and sprinkles—let your chaos run wild.
- Finish with drips or smudges of chocolate syrup—adds oozy intensity.
Rest & final touches
Let the decorated cupcakes sit for 10 minutes—frosting firms up slightly, making decorations stick better. Serve immediately or store in a cool place for a few hours. They’re best fresh but hold up surprisingly well overnight.
Knowing when they’re done
- Frosting is firm and set but not cracked.
- Cupcakes bounce back gently when pressed—no squishiness.
- Decorations stay put—no sagging or melting.
Oops moments and how to fix them without losing your spooky vibe
- FORGOT the frosting? Dab a little whipped cream or marshmallow fluff. It’s surprisingly cute.
- DUMPED too much food coloring? Blot with a paper towel and add more frosting for balance.
- OVER-TORCHED edges? Trim with a small knife and cover with extra frosting or sprinkles.
- Frosting cracks? Smooth with a warm spatula—quick fix for a polished look.
Quick hacks to keep your creepy cool
- When frosting is too stiff, splash with a teaspoon of milk—easier to pipe.
- Patch small cracks with a dab of frosting—makes it look intentional.
- Shield delicate decorations with a light mist of edible spray—shimmering or matte.
- When in doubt, sprinkle with extra sprinkles—distraction is your friend.
- If you’re out of candy eyes, pipe tiny dots of black icing—just as spooky.
Decorating these cupcakes is a bit chaotic, but that’s part of the fun. You’ll find yourself giggling at the silly fangs or the googly eyes that seem to look back at you. They’re imperfect, just like a real Halloween night—messy, a little spooky, but full of character.
In the end, it’s the little imperfections that make each cupcake uniquely creepy. They’re not just treats, but tiny canvases for your creativity. So, embrace the chaos and enjoy the sweet, spooky chaos you’ve created.
Spooky Halloween Cupcakes
Ingredients
Equipment
Method
- Preheat your oven to 180°C (350°F) and line your cupcake tin with dark or spooky-themed liners.
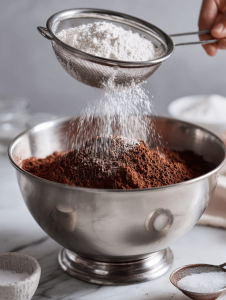
- In a large mixing bowl, sift together the flour and cocoa powder until well combined and free of lumps. This creates a rich, dark batter base.
- Add the granulated sugar and vegetable oil to the dry mixture, then crack in the eggs one at a time, beating well after each addition. You’ll notice the batter becoming smooth and glossy.
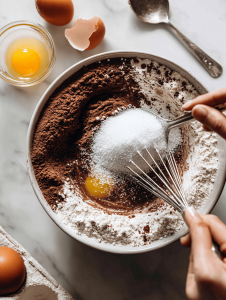
- Pour in the buttermilk and vanilla extract, then gently fold everything together until the batter is uniform and slightly fluffy, about 2 minutes.
- Divide the batter evenly among the cupcake liners, filling each about two-thirds full to allow for a nice domed top. Tap the tray gently on the counter to settle the batter.
- Bake the cupcakes for 18–20 minutes, until the edges are slightly golden and a toothpick inserted in the center comes out clean. You’ll hear a gentle sizzle as they bake.
- Remove the cupcakes from the oven and let them cool in the tin for about 5 minutes until they’re firm enough to transfer. Then, move them to a wire rack and cool completely.
- While the cupcakes cool, prepare the vanilla frosting. Beat the softened butter with powdered sugar, adding food coloring gels to match your spooky theme. Adjust the consistency with milk until smooth and spreadable.
- Once cooled, pipe the frosting onto each cupcake using a round tip, creating a smooth or textured surface depending on your piping technique. Be playful—try swirls or jagged edges for extra creepiness.
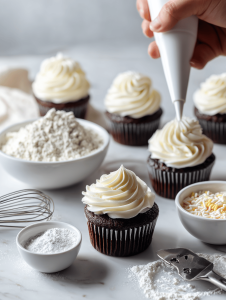
- Decorate each cupcake with mini edible eyes, sugar fangs, and colorful sprinkles to add character and chaos. Use tweezers or toothpicks for precise placement.
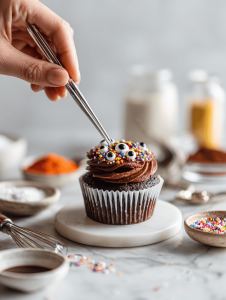
- Finish by drizzling chocolate syrup or black gel over the frosting for oozy, smudgy effects. Let the decorations set for about 10 minutes before serving to ensure everything stays in place.
These cupcakes aren’t meant to be perfect—they’re meant to be fun. Sometimes, the best spooky treats come from a little mess and a lot of imagination. There’s a strange satisfaction in seeing your chaos turn into something adorable and a little bit creepy.
Whether you’re baking for a crowd or just sneaking a few bites yourself, these spooky cupcakes bring a playful spirit to any night. And honestly, that’s what makes them worth the effort—little moments of joy wrapped in a messy, spooky package.