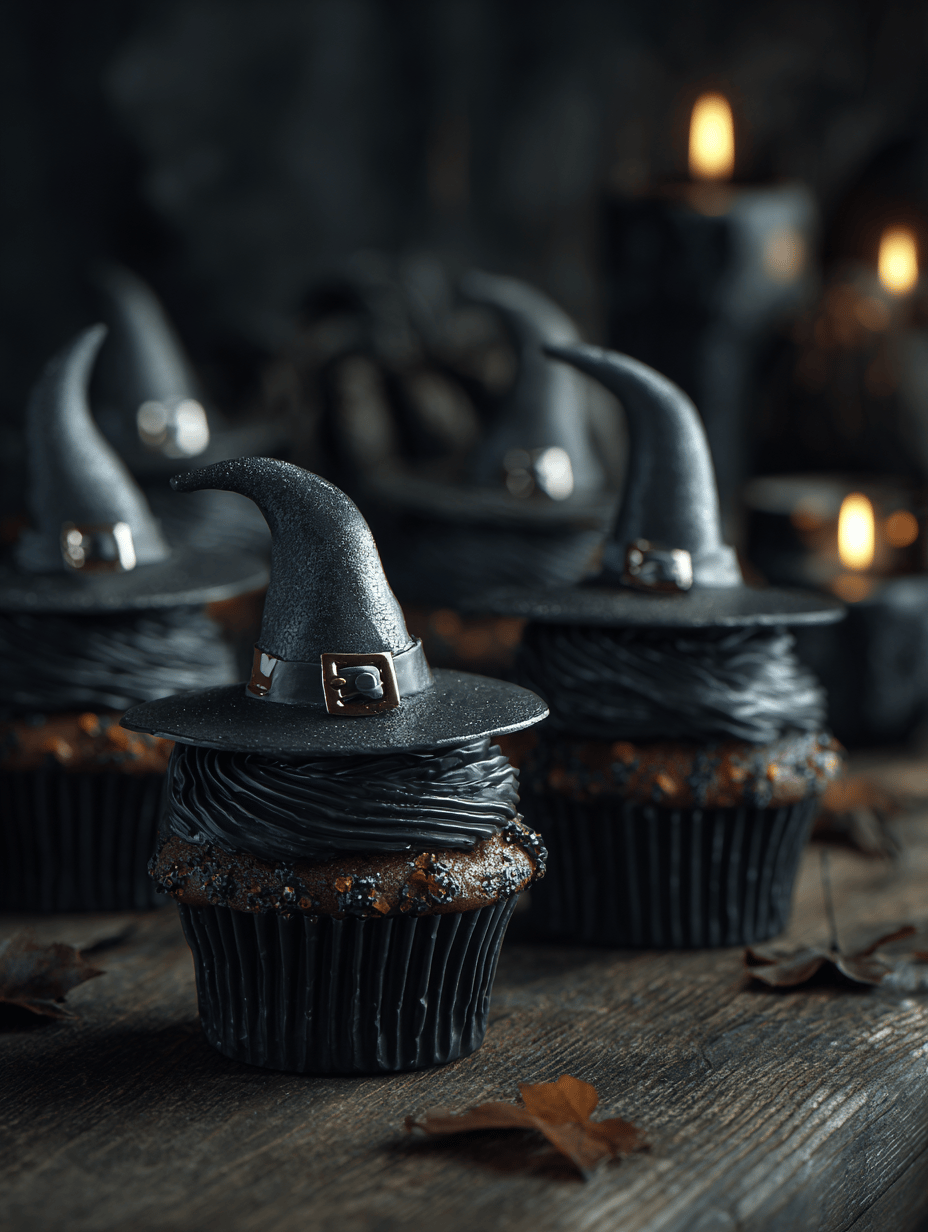
There’s something oddly satisfying about creating a treat that looks as whimsical as it is delicious. These witch hat cupcakes aren’t just for Halloween—they’re a little bit mischievous, a little bit charming, and perfect for anyone who loves a dash of magic in their baking.
I’ve always been drawn to desserts that surprise the eye and the palate. These cupcakes give me a chance to play with fondant, shape like tiny witch hats, then fill my house with the warm smell of chocolate and vanilla. It’s a simple trick, but it sparks joy every time I make them, whether I’m baking alone or with a crowd.
In the end, it’s about the little details—the swooping ribbons of fondant, the crispy edges of the cupcake, the creamy fillings inside. They remind me that sometimes, the most fun comes from getting a little messy, a little creative, and just letting the magic happen.
Why I Love These Wickedly Cute Cupcakes
- They bring back childhood memories of costume parties and candy corn chaos.
- Watching others’ faces light up when they see a tiny witch’s hat is a small victory.
- These are surprisingly forgiving—perfect for bakers still learning fondant tricks.
- They make any gathering feel special, even if it’s just a quiet night at home.
- I feel a tiny thrill every time I pipe the last swirl of frosting—like casting a spell.
Ingredient Secrets for a Spellbinding Finish
- Chocolate cupcakes: I use rich, dark cocoa—gives the hats a smoky depth. Swap for carob, if you want a caffeine-free version.
- Vanilla frosting: I prefer a buttercream that’s fluffy and sweet, but cream cheese frosting works for a tangy twist.
- Fondant: I buy premade, but homemade marshmallow fondant is a fun project if you’re feeling adventurous.
- Black gel food coloring: It’s intense, so add a drop at a time until it’s just right—look for a glossy, jet-black finish.
- Mini chocolate chips: These are perfect for tiny hat brims or embellishments, but crushed cookies can be a good substitute.
- Candy eyes: Add a little fun—if you don’t have any, use small dots of white and black icing.
- Decorative ribbons: Use licorice or thin strips of fondant to mimic hat bands, or go wild with edible glitter.
Crafting Your Enchanted Cupcakes: The Magic Steps
Equipment & Tools
- Cupcake tins: Standard size for even baking.
- Mixing bowls: For batter and frosting prep.
- Electric mixer: Ensures fluffy frosting and smooth batter.
- Ice cream scoop: For even cupcake portions.
- Fondant tools: Rolling pin, cutters, and modeling tools.
- Piping bags & tips: For frosting swirls and details.
- Small paintbrush: For edible glue or attaching fondant details.
Mise en place
- Preheat oven to 180°C (350°F). Line cupcake tins.
- Prepare ingredients: measure flour, cocoa, sugar, butter, eggs, vanilla.
- Color fondant: add gel dye gradually until jet black.
- Cut fondant into small pieces for shaping.
- Gather decorating supplies: candy eyes, ribbons, sprinkles.
Steps
- Mix dry ingredients: flour, cocoa, baking powder, salt. Set aside.
- Cream butter and sugar until light and fluffy—about 3 minutes.
- Add eggs one at a time, then vanilla. Mix well.
- Alternately add dry ingredients and milk, start and end with dry. Mix just until combined.
- Divide batter into cupcake liners, fill halfway. Bake 18-20 min, 180°C (350°F). Cool 10 min.
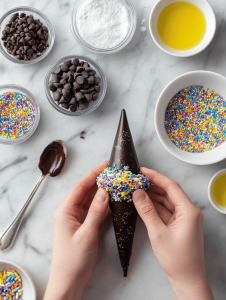
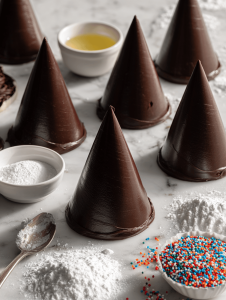
- While baking, roll out fondant thinly. Cut into small circles for hat brims.
- Pipe frosting onto cooled cupcakes in a swirl, then shape fondant into tiny hats.
- Attach fondant hats to cupcakes with edible glue. Add candy eyes and ribbons.
- Let set for 30 minutes before serving. The fondant should be firm, frosting smooth.
- If frosting cracks, warm slightly and re-smooth with a spatula.
Resting & Finishing
Let cupcakes sit for 15 minutes to firm up. Add final touches like sprinkles or edible glitter. Serve when ready or keep in a cool, dry place.
Checkpoints & How to Know It’s Done
- Cupcakes are golden and spring back when lightly pressed.
- Frosting is set but not hard, with a shiny finish.
- Fondant hats hold shape without sagging.
Oops Moments & How to Fix the Halloween Fumble
- FORGOT to cool cupcakes? Pop them in the fridge for 10 minutes.
- DUMPED too much fondant? Roll it thinner or patch with a tiny piece.
- OVER-TORCHED edges? Trim with scissors and reattach with frosting.
- Frosting cracks? Warm slightly and re-smooth with a spatula.
Quick Fixes for Last-Minute Magic
- When fondant is too stiff, knead briefly with a drop of water.
- Splash a little edible shimmer on hats for extra glam.
- Patch small tears with a damp brush and extra fondant bits.
- Shield frosting from heat by chilling cupcakes for 10 minutes before decorating.
- When in doubt, add a tiny candy embellishment—instant charm, instant fix.
These cupcakes are more than just a dessert. They’re a little ritual, a splash of holiday cheer, a reminder that baking can be playful and a tiny bit wild. No matter the season, a batch of witch hats always sparks a smile.
So, gather your ingredients, turn on some spooky tunes, and let your imagination run wild. Sometimes, the best magic happens when you’re not quite sure what’s coming next—and that’s part of the fun.

Witch Hat Cupcakes
Ingredients
Equipment
Method
- Preheat your oven to 180°C (350°F) and line your cupcake tins with paper liners.
- In a large mixing bowl, whisk together the flour, cocoa powder, baking powder, and salt until well combined. This creates a rich, chocolatey dry mixture.
- In another bowl, cream the softened butter and sugar using an electric mixer until the mixture is light, fluffy, and slightly pale—about 3 minutes. This develops a tender crumb in the cupcakes.
- Add eggs one at a time, beating well after each addition, then mix in vanilla extract. The batter will become smooth and glossy.

- Alternately add the dry ingredients and milk to the wet mixture, starting and ending with the dry ingredients. Mix just until combined after each addition; do not overmix to keep the cupcakes light.
- Use an ice cream scoop to evenly distribute the batter into the prepared cupcake liners, filling each about halfway. Bake for 18-20 minutes or until a toothpick inserted into the center comes out clean. Let the cupcakes cool in the tins for 10 minutes before transferring to a wire rack.
- While the cupcakes cool, roll out your fondant on a clean surface dusted lightly with cornstarch or powdered sugar until it's very thin. Use small cookie cutters to cut out circles for the hat brims, and shape tiny cones for the hats.
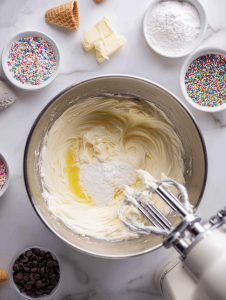
- Prepare your buttercream frosting by beating softened butter until creamy, then gradually add confectioners' sugar, vanilla, and a few drops of black gel food coloring until you achieve a deep, glossy black color and fluffy consistency.
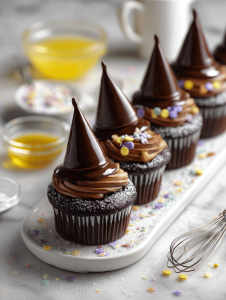
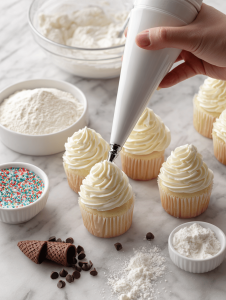
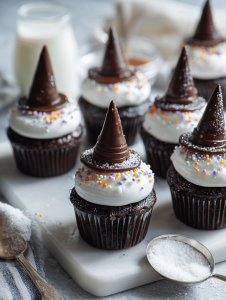
- Pipe a generous swirl of frosting onto each cooled cupcake using a piping bag fitted with a large star tip. This creates a fluffy, inviting top.
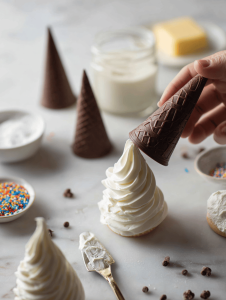
- Attach the fondant hat cones to the center of each frosted cupcake with a dab of edible glue or water. Place the fondant brim circles at the base of the hats for a finished look.
- Add tiny candy eyes to the front of each hat using a small dab of frosting or edible glue, and decorate the hat bands with licorice or fondant strips. Place mini chocolate chips along the brim for extra detail.
- Let the cupcakes sit for at least 30 minutes to allow the fondant to set and the decorations to firm up. Then, they’re ready to serve and enchant your guests with their whimsical charm!
Notes
As the last hat is placed and the sprinkles are dusted, I find myself lingering over these tiny spells. They’re not just treats—they’re stories, moments, little bit of chaos turned into something sweet.
Maybe next time I’ll experiment with different colors or fill the cupcakes with gooey caramel. For now, I’m happy watching the smiles, knowing I’ve added a bit of mischief to the night. That’s enough magic for me.